1. At a member server or domain controller in your internal network, log on as a domain administrator. Click Start, point to Control Panel and click Add/Remove Programs.
2. In the Add or Remove Programs window, click the Add/Remove Windows Components button.
3. In the Windows Components dialog box, click on the Certificate Services entry and click the Details button.
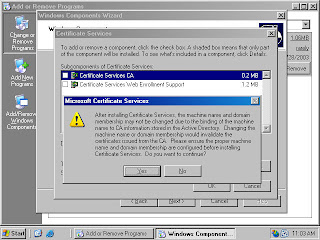
4. In the Certificate Services dialog box, put a checkmark in the Certificate Services CA checkbox. A Microsoft Certificate Services dialog box appears and informs you that you can not change the machine name or the domain membership of the machine while it acts as a certificate server. Read the information in the dialog box and click Yes.
 5. Both the Certificate Services CA and Certificate Services Web Enrollment Support checkboxes are checked. Click OK in the Certificate Services dialog box.
 6. Click Next in the Windows Components dialog box
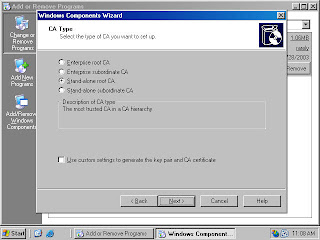
7. Select the Stand-alone root CA option on the CA Type page. Click Next.
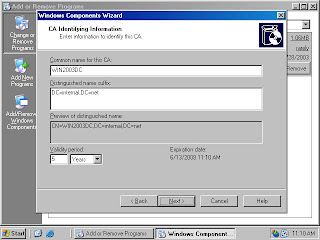
 8. On the CA Identifying Information page, type in a Common name for this CA. The common name of the CA is typically the DNS host name or NetBIOS name (computer name) of the machine running Certificate Services. In this example, the name of the machine is WIN2003DC, so we will enter WIN2003DC in the Common name for this CA text box. The default Validity Period of the CA’s self-signed certificate is 5 years. Accept this default value unless you have a reason to change it. Click Next.
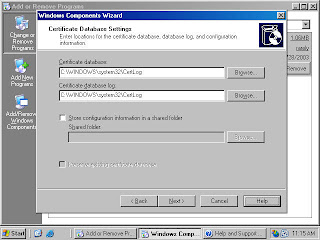
  9. On the Certificate Database Settings page, use the default locations for the Certificate Database and Certificate Database Log. You do not need to specify a shared folder to store configuration information because this information will be stored in the Active Directory. Click Next.
  10. Click Yes on the Microsoft Certificate Services dialog box informing you that Internet Information Services must be stopped temporarily.
 11. Click Yes on the Microsoft Certificate Services dialog box informing you that Active Server Pages must be enabled on IIS if you wish to use the Certificate Services Web enrollment site.
12. Click Finish on the Completing the Windows Components Wizard page.
13. Close the Add or Remove Programs window.
The standalone Certificate Server is now ready to accept certificate requests.
No comments:
Post a Comment